Walking Poles have made my walking career safer and more enjoyable and this newsletter offers some advice and how and why to use them. I guide groups on the Heysen Trail, Australia’s great adventure walk that travels from the shores of the Southern Ocean to the desert mountains of the Flinders Ranges and this is intended to help the beginners.
There is not much science when it comes to walking poles. Just opinion and plenty of it. I have seen biomechanical studies showing 20 to 30% reduction on your knees, but they have all been very small studies in laboratory settings. Alternatively, there are counterclaims that they increase the workload on inefficient arm muscles. So, I do not invoke any evidence and simply relate opinion from two decades of use.
Why do I use them? In order of value;
1 Primarily as stabilisers so that I do not have to do much foot gazing. I prefer to gaze on the landscape and look to the horizon. Then if I trip or stumble on the unexpected, my arms stabilise and correct. This is particularly useful if you are navigating a trail or terrain, when your vision is determinedly distant. For this to work you have to be using them as stabilisers. This is a matter of technique, which we will come to, and practice. The stronger your arms and the stronger your knees and particularly ankles, the less you will need to watch your feet. On broken ground, such as creek beds, scree and boulders, two stabilisers also save time and energy. I was taught this lesson many years ago in New Zealand walking through scree covered by snow grass. I was only a solo pole user and would be left floundering way behind my more experienced double poling partner.
2 Downhill propping would be the second most common function, facilitating fluid, flowing descents which preserve both energy and your knees. Once again it depends upon technique.
3 Propulsion, in true Nordic style, but this only applies to a flat-level track. It can be very useful on road sections and climbing slippery slopes when shortened poles can act like ice axes.
4 Stop my hands swelling in hot weather, and I love walking arid mountain terrain which can get quite warm.
5 Protection from dogs and mad cows, but I have never had to use them so in 25 years.
There are two principal reasons not to use poles:
You do not have the coordination to master them, but I think this is rare. Double poling initially feels awkward just like every new skill.
You do not have the upper body strength to use them to maximal advantage, in which case you can use them just as the occasional prop like a walking stick.
There is also an environmental consideration because they can increase the damage to fragile alpine terrain as well as inoculate fungal diseases. Both can be mitigated with good handling and knowing when to use rubber stoppers or when to put your poles away.
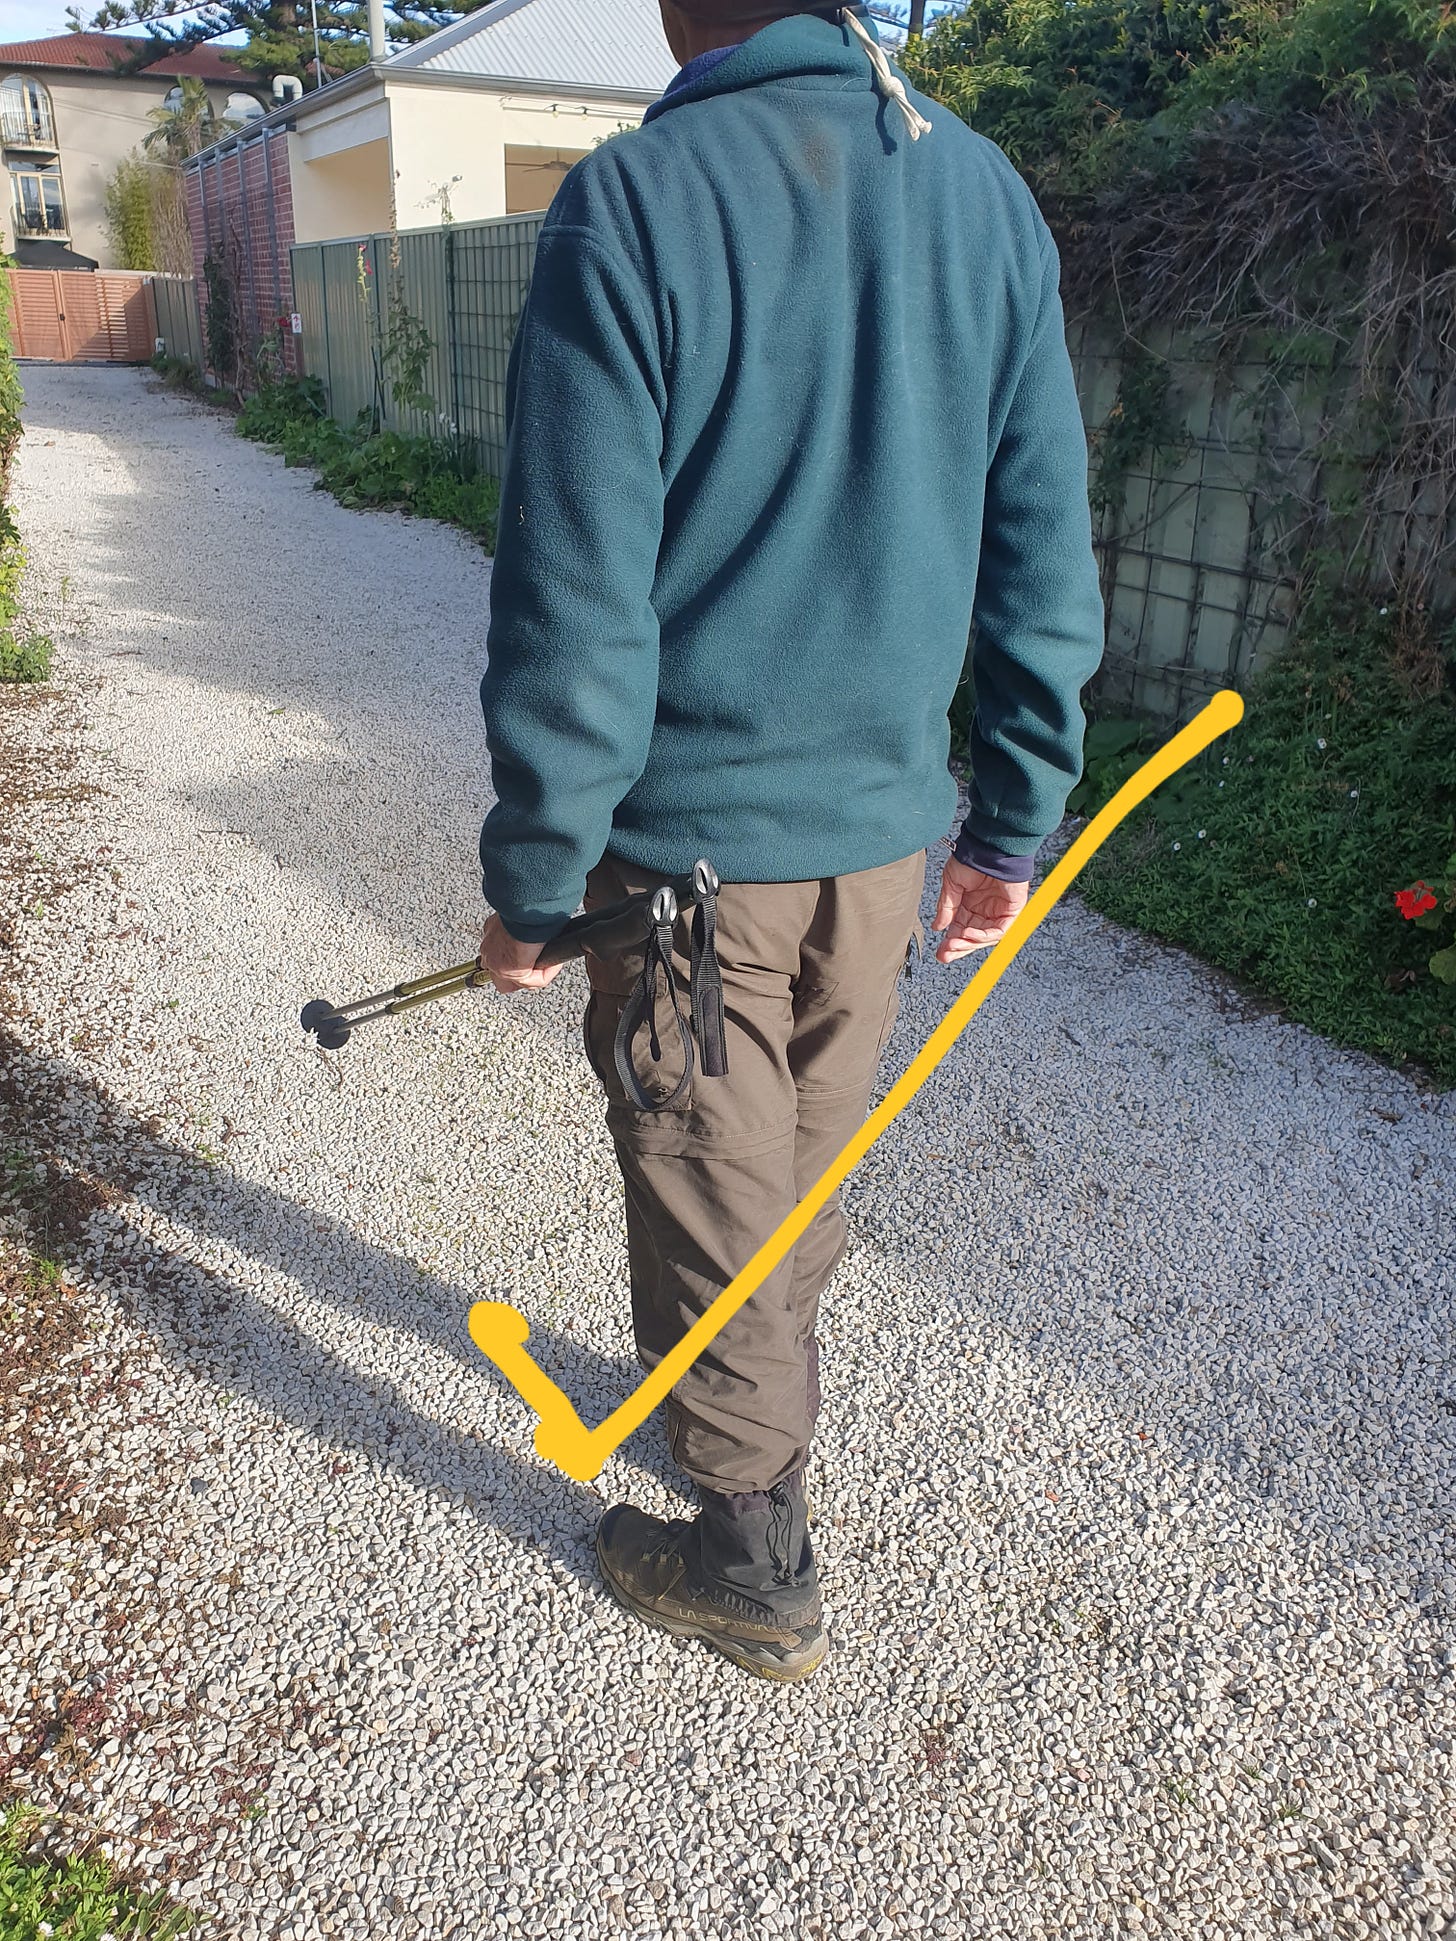
Before discussing technique, it is necessary to deal with safety. Being poked with a sharp stick is never fun, worse if it is tungsten tipped. Just covering the tips is not enough and the tips are too valuable to sheath permanently, as you will see when we discuss technique. The safety rules are very simple but require constant vigilance. Never let your pole/s point backward. That means if you are not using them, let them drag along, hanging from your wrist strap, or hold them with the tips forward. Too often I see someone swinging their arms with their poles scything the trail behind them! A very effective technique to become a solo walker.
Never walk too close to the person ahead. Spiking the front walker is the commonest mistake. This rule is just as important to the non-pole user. A pole slipping during an ascent can catch the walker behind. I have seen this too often and one eye injury too many.
Do not walk packed shoulder to shoulder. Your poles are tripping hazards to the parallel walkers.
And now we come to the great strap debate, which can get very fervid. Many propose that if you put your hand through the strap, you can break your wrist. I am sure you can, but I do not think the strap makes it more or less likely mechanically. Gravity is doing the damage. The advantage of using the straps far outweighs the risks as you will see when we come to technique.
I have heard of professional guides berating pole users as soon as they ‘strap in,’ citing the risk of tripping to your death on a defile because you could not let go of your pole. This may be so on a narrow ledge in which case your poles should always be in front of you anyway. However, be aware that in the absence of evidence, dogma takes over, so do not debate the issue.
Poles can collapse on you at critical stages, particularly downhill, so it is always safer to maintain them well, and check the locking mechanisms at the start of each walk.
So, how to be safe around them and with them may be all you need to know about walking poles. However, if you want to use them to their full bushwalking potential (and lift you eyes to the horizon) then it is all about technique.
Norwegian technique, akin to cross country skiing is well covered on YouTube. It is useful for walking fast on flat smooth tracks and I often use it on the Heysen Trail if I wish to cover ground quickly. Your poles are pushing behind you to propel yourself forward. It is an energy intensive process and overkill for most group walks. On the generally rougher, more challenging Heysen Trail the biggest advantage poles offer is stability, increasing safety and saving energy.
Height of poles: When your poles are planted, your elbows should be bent at 90 degrees. Obviously, the height of the pole will vary depending on the slope ie longer downhill, shorter up. In practice most people do not continually adjust for the terrain but start with a slightly longer pole to accommodate the more difficult / treacherous situation of downhills. However, if on a steep or slippery down, I always lengthen my poles. The longer the better. On steep ups you can use shortened poles like an ice axe to dig in and pull yourself. This is very useful in mud or scree, but requires upper body strength.
Gripping the poles in the most efficient manner is very important to avoid hand fatigue and help with the best walk rhythm.
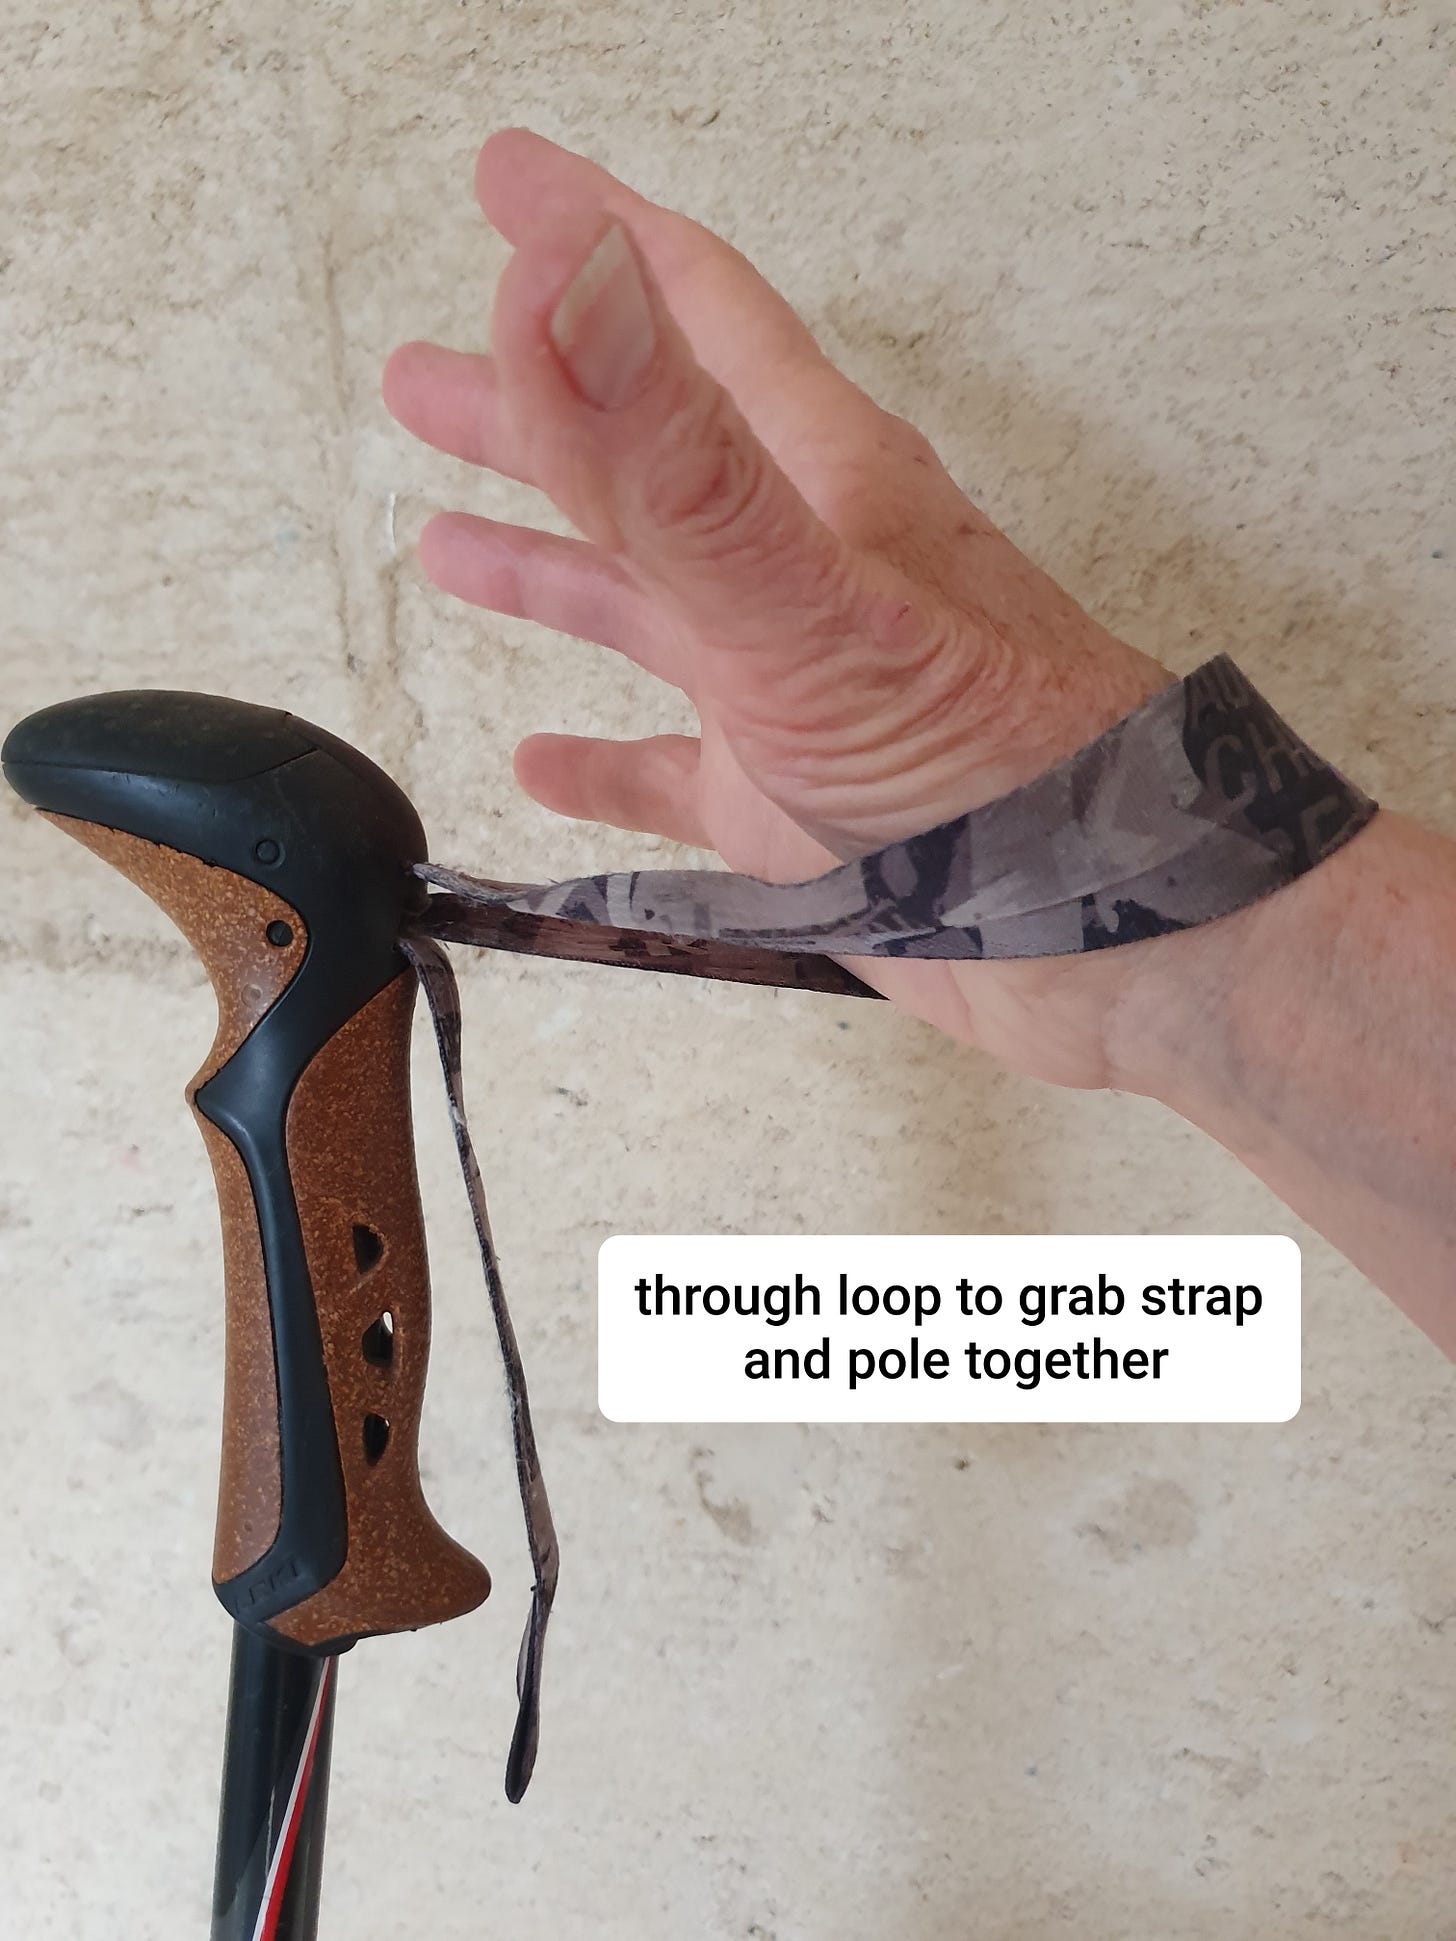
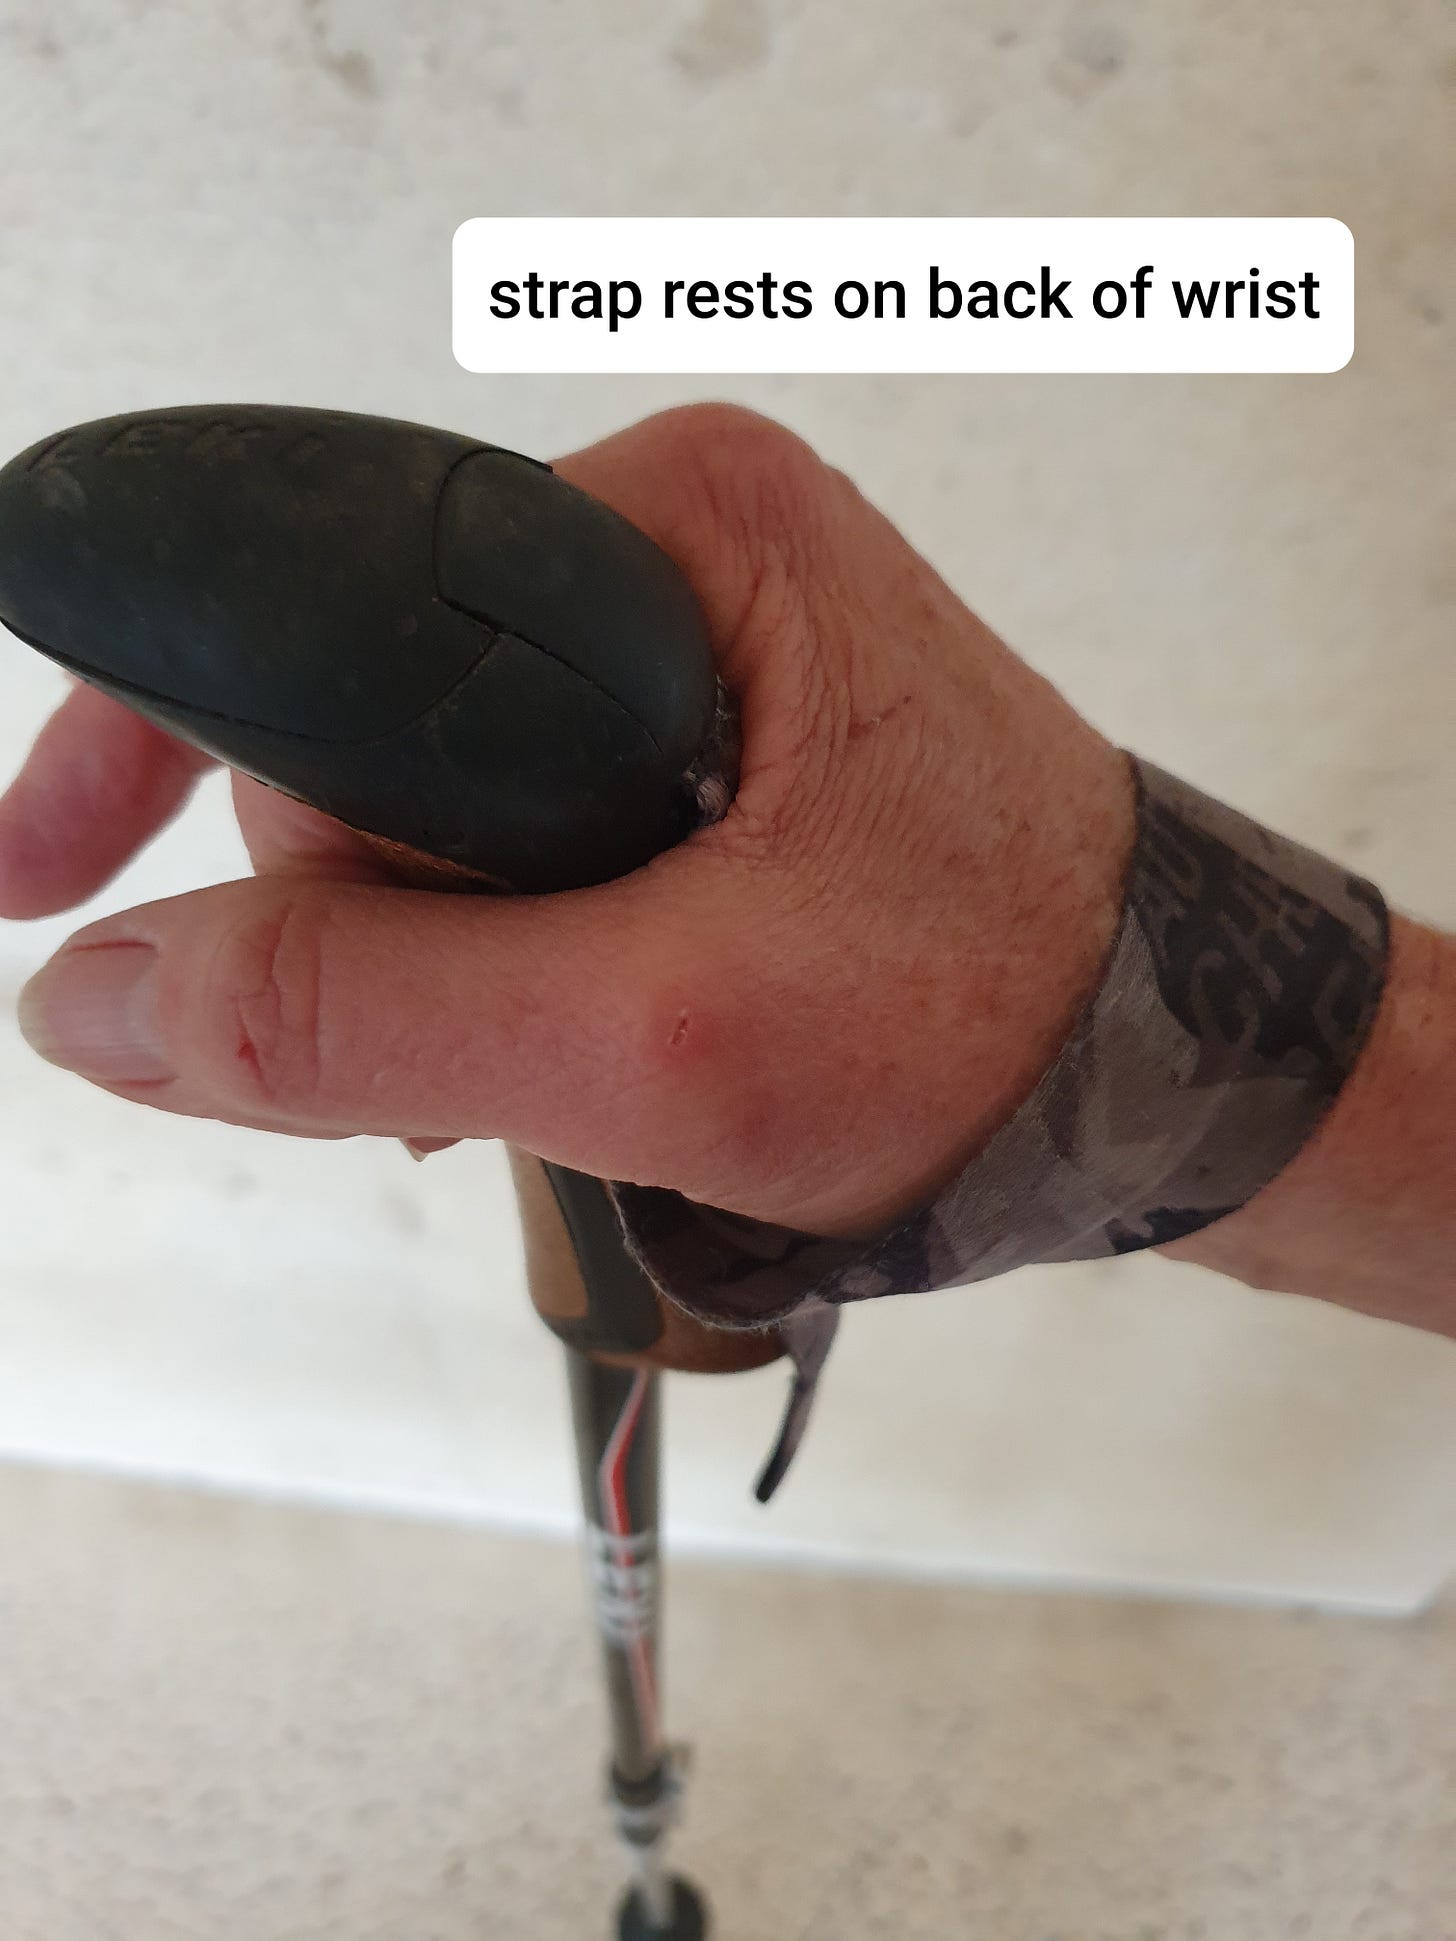
Slip your hand into the loop from below, reaching for the sky, then grab the straps and the poles together. The loop should be long enough for the strap to fall across the back of your hand lightly. If you can feel pressure, the loop is too tight. If the loop is flopping around, it is too long. The pole and the straps should fit comfortably in the webbing between thumb and first finger. Be aware that this webbing can be quite soft and a potential blister area when you begin using poles in this manner, easily overcome by wearing sun gloves. The advantage of this grip is the control it offers over the pole. You do not have to clasp the handle tightly, indeed, only first finger and thumb is sufficient. No need for hand fatigue at the end of long day. Going downhill, the weight is taken by the back of the wrist, controlling the pole easily.
However, the biggest advantage of this grip is the ability to move the pole forward with a small flick of the wrist. No need to laboriously pick up and place your poles when you are moving on the flat. Your elbows will hardly move when you are using the poles for stability rather than propulsion. This saves energy over the course of a long walk.
The flick is also quicker than lifting and placing your poles. This becomes very important if you are on a steep down where it makes for smooth efficient descent, but like anything it takes practice. Eventually you won’t have to think about it, and on flat tracks it increases the time spent enjoying the scenery rather than looking at your feet.
Having mastered the grip and flick you are ready for two challenges:
Stability Technique:
Used for rough terrain eg broken ground, creek beds, and when gazing to the horizon or navigating.
Just as the name implies your poles remain in front or level with your feet. The left pole moves forward with the right foot and vice versa. The flick makes this effortless. If you footing is insecure, the pole in opposite hand becomes your sabiliser. Once your ankles are conditioned and strong you can move just as quickly on broken ground as flat, which is a huge advantage in bushwalking.
Downhill technique: used on any slope.
The safest decent (this is an example of do as I say, not as I do) also requires that you keep your poles in front of you. The steeper the descent the further in front, therefore you definitely need to lengthen your poles. Dig them in 60 - 90 cms in front of you. This is why I prefer tungsten tips to rubber stoppers. Leaning forward with bent knees, keep your centre of gravity just forward of your waist, making it very difficult for your feet to slip from under you. Again, use your poles with alternate feet to hands. You will always maintain at least two points of contact while all the time leaning forward. On very slippery ground you keep three points of contact and take very small steps, bending as low as you can go. If you go slowly, you will have three points of contact for much of the time. Moving smoothly down the slope avoids the temptation to stop, prop and lean backward, but requires smooth flicking to keep your poles in front of you.
Best to start slowly even if the slope is not slippery (again do as I say rather than as I do). Hopefully you will have years of fun downhills ahead of you. Many bushwalkers / hikers hate going downhill! With practice it will become the favourite fun part of the walk.
Happy poling.


